Search This Blog

Tuesday, July 30, 2013

SSIS Interview Questions - Part 1


By: 

Problem

When preparing for a SQL Server interview, it is helpful to understand what questions may be asked related to SSIS.  In this tip series,  I will try to cover as much as I can to help you prepare.

Solution

What is SQL Server Integration Services (SSIS)?

  • SQL Server Integration Services (SSIS) is component of SQL Server 2005 and later versions. SSIS is an enterprise scale ETL (Extraction, Transformation and Load) tool which allows you to develop data integration and workflow solutions. Apart from data integration, SSIS can be used to define workflows to automate updating multi-dimensional cubes and automating maintenance tasks for SQL Server databases.

How does SSIS differ from DTS?

  • SSIS is a successor to DTS (Data Transformation Services) and has been completely re-written from scratch to overcome the limitations of DTS which was available in SQL Server 2000 and earlier versions. A significant improvement is the segregation of the control/work flow from the data flow and the ability to use a buffer/memory oriented architecture for data flows and transformations which improve performance.

What is the Control Flow?

  • When you start working with SSIS, you first create a package which is nothing but a collection of tasks or package components.  The control flow allows you to order the workflow, so you can ensure tasks/components get executed in the appropriate order.

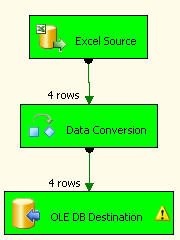
What is the Data Flow Engine?

  • The Data Flow Engine, also called the SSIS pipeline engine, is responsible for managing the flow of data from the source to the destination and performing transformations (lookups, data cleansing etc.).  Data flow uses memory oriented architecture, called buffers, during the data flow and transformations which allows it to execute extremely fast. This means the SSIS pipeline engine pulls data from the source, stores it in buffers (in-memory), does the requested transformations in the buffers and writes to the destination. The benefit is that it provides the fastest transformation as it happens in memory and we don't need to stage the data for transformations in most cases.

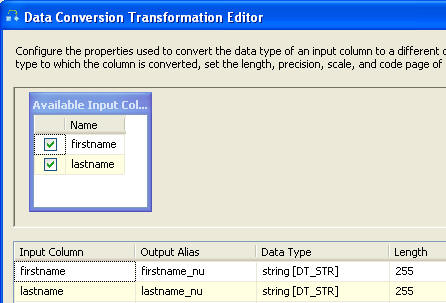
What is a Transformation?

  •  A transformation simply means bringing in the data in a desired format. For example you are pulling data from the source and want to ensure only distinct records are written to the destination, so duplicates are  removed.  Anther example is if you have master/reference data and want to pull only related data from the source and hence you need some sort of lookup. There are around 30 transformation tasks available and this can be extended further with custom built tasks if needed.
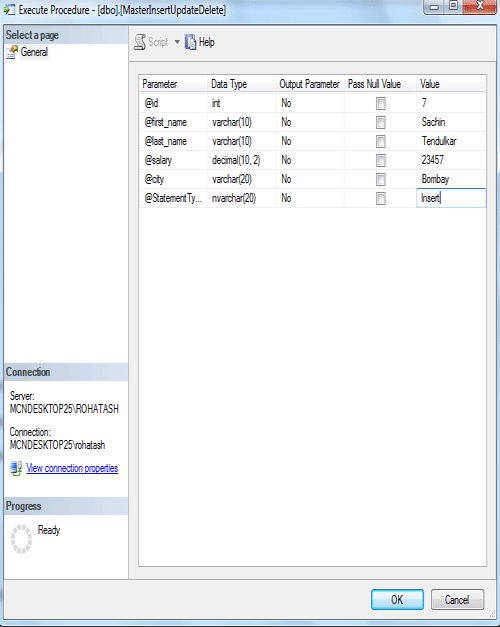
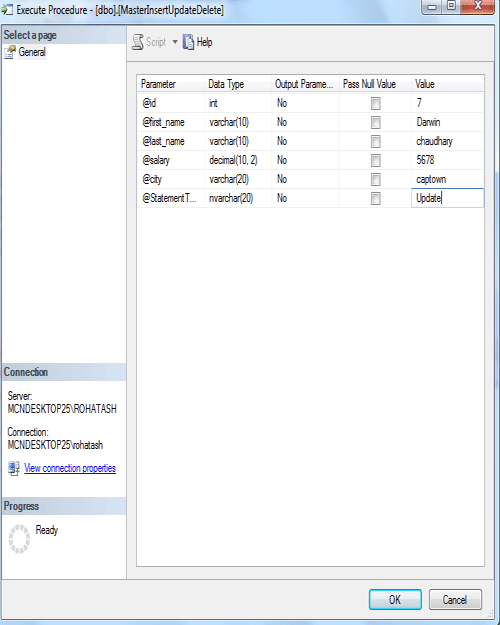
What is a Task?

  • A task is very much like a method of any programming language which represents or carries out an individual unit of work. There are broadly two categories of tasks in SSIS, Control Flow tasks and Database Maintenance tasks. All Control Flow tasks are operational in nature except Data Flow tasks. Although there are around 30 control flow tasks which you can use in your package you can also develop your own custom tasks with your choice of .NET programming language.

What is a Precedence Constraint and what types of Precedence Constraint are there?

  • SSIS allows you to place as many as tasks you want to be placed in control flow. You can connect all these tasks using connectors called Precedence Constraints. Precedence Constraints allow you to define the logical sequence of tasks in the order they should be executed. You can also specify a condition to be evaluated before the next task in the flow is executed.
  • These are the types of precedence constraints and the condition could be either a constraint, an expression or both 
    • Success (next task will be executed only when the last task completed successfully) or
    • Failure (next task will be executed only when the last task failed) or
    • Complete (next task will be executed no matter the last task was completed or failed).

What is a container and how many types of containers are there?

  • A container is a logical grouping of tasks which allows you to manage the scope of the tasks together.
  • These are the types of containers in SSIS:
    • Sequence Container - Used for grouping logically related tasks together
    • For Loop Container - Used when you want to have repeating flow in package
    • For Each Loop Container - Used for enumerating each object in a collection; for example a record set or a list of files.
  • Apart from the above mentioned containers, there is one more container called the Task Host Container which is not visible from the IDE, but every task is contained in it (the default container for all the tasks).

What are variables and what is variable scope?

  • A variable is used to store values. There are basically two types of variables, System Variable (like ErrorCode, ErrorDescription, PackageName etc) whose values you can use but cannot change and User Variable which you create, assign values and read as needed. A variable can hold a value of the data type you have chosen when you defined the variable.
  • Variables can have a different scope depending on where it was defined. For example you can have package level variables which are accessible to all the tasks in the package and there could also be container level variables which are accessible only to those tasks that are within the container.

Monday, July 29, 2013

Import Excel unicode data with SQL Server Integration Services


By:    |   Read Comments (41)   |   Related Tips: 1 | 2 | 3 | 4 | 5 | More > Integration Services Excel

Problem

One task that most people are faced with at some point in time is the need to import data into SQL Server from an Excel spreadsheet.  We have talked about different approaches to doing this in previous tips using OPENROWSET, OPENQUERY, Link Servers, etc... These options are great, but they may not necessarily give you as much control as you may need during the import process.
Another approach to doing this is using SQL Server Integration Services (SSIS).  With SSIS you can import different types of data as well as apply other logic during the importing process.  One problem though that I have faced with importing data from Excel into a SQL Server table is the issue of having to convert data types from Unicode to non-Unicode.  SSIS treats data in an Excel file as Unicode, but my database tables are defined as non-Unicode, because I don't have the need to store other code sets and therefore I don't want to waste additional storage space.  Is there any simple way to do this in SSIS?

Solution

If you have used SSIS to import Excel data into SQL Server you may have run into the issue of having to convert data from Unicode to non-Unicode.  By default Excel data is treated as Unicode and also by default when you create new tables SQL Server will make your character type columns Unicode as well (nchar, nvarchar,etc...)  If you don't have the need to store Unicode data, you probably always use non-Unicode datatypes such as char and varchar when creating your tables, so what is the easiest way to import my Excel data into non-Unicode columns?
The following shows two different examples of importing data from Excel into SQL Server.  The first example uses Unicode datatypes and the second does not.
Here is what the data in Excel looks like.

Example 1 - Unicode data types in SQL Server

Our table 'unicode" is defined as follows:
CREATE TABLE [dbo].[unicode](
[firstName] [nvarchar](50) NULL,
[lastName] [nvarchar](50) NULL
) ON [PRIMARY]
If we create a simple Data Flow Task and an Excel Source and an OLE DB Destination mapping firstname to firstname and lastname to lastname the import works great as shown below.

Example 2- non-Unicode data types in SQL Server

Our table 'non_unicode" is defined as follows:
CREATE TABLE [dbo].[non_unicode](
[firstName] [varchar](50) NULL,
[lastName] [varchar](50) NULL
) ON [PRIMARY]
If we map the columns firstname to firstname and lastname to lastname we automatically get the following error in the OLE DB Destination.
Columns "firstname" and "firstname" cannot convert between unicode and non-unicode data types...
If we execute the task we get the following error dialog box which gives us additional information.

Solving the Problem

So based on the error we need to convert the data types so they are the same types.
If you right click on the OLE Destination and select "Show Advanced Editor" you have the option of changing the DataType from string [DT_STR] to Unicode string [DT_WSTR].  But once you click on OK it looks like the changed was saved, but if you open the editor again the change is gone and back to the original value.  This makes sense since you can not change the data type in the actual table.

If you right click on the Excel Source and select "Show Advanced Editor" you have the option of changing the DataType from Unicode string [DT_WSTR] to string [DT_STR] and the change is saved. 
If you click OK the change is saved, but now you get the error in the Excel Source that you can not convert between unicode and non-unicode as shown below.  So this did not solve the problem either.

Using the Data Conversion Task

So to get around this problem we have to also use a Data Conversion task.  This will allow us to convert data types so we can get the import completed.  The following picture shows the "Data Conversion" task in between the Excel Source and the OLE DB Destination.
If you right click on "Data Conversion" and select properties you will get a dialog box such as the following.  In here we created an Output Alias for each column.
Our firstname column becomes firstname_nu (this could be any name you want) and we are making the output be a non-unicode string.  In addition we do the same thing for the lastname column.
If we save this and change the mapping as shown to use our new output columns and then execute the task we can see that the import was successful.

As you can see this is pretty simple to do once you know that you need to use the Data Conversion task to convert the data types.

How to create a simple database backup using SQL Server Management Studio (SSMS)


By:    

Problem

You are brand new to SQL Server and you need to create a SQL Server database backup, but you have no idea what to click on.  In this tip we walk through the steps to create a simple backup using SQL Server Management Studio.

Solution

This tip guides you through the steps to make a simple one-off backup.

Step 1

Open SSMS and expand the Database tree as shown below and right mouse click on the database you wish to backup. Then move your mouse carefully over Tasks and then click on Back Up... as shown below.
click on the database

Step 2

At this point pause and look at the options before you click.
Choose Tasks then the Back Up option
When we see so many options, and there are more under the options tab, it is hard to know what to do so let's look at only the essential things. I have circled the essentials in red.
(If you wish to know more about the options page look at this page at Back Up Database (Options Page) at Microsoft. You may wish to visit this MSSQLTips backup tutorial as well.)
  • First the source database is listed, confirm it is the database you wish to backup.
  • Next the backup type is Full. This option will give us a full backup. There are other types, but let's leave it as Full.
  • Notice the "Copy-only Backup" check box. Check it if you wish to use this option. You may be thinking, a backup is a copy of the database. Yes that is true however the copy it is referring to relates to a "chain" of backups. This is important if you do not wish to break the backup chain. My tip is to check that check-box. See tip 1772 by Atif Shehzad or Copy-Only Backups at Microsoft for more information.
  • Next leave the "Database" as the component we wish to backup.  This will backup the entire database.
  • Next unless you know the path and name displayed are what you want, click "Remove" to remove the default backup path and name. Note this does not remove that file if it exists it simply removes that path and file name from this dialog box.

Step 3

Next click on "Add..." and browse to a path you know has room for your backup. It is possible to enter a URL at this point. (\\Server\Drive\Path\File_Name)
Note that if at all possible you should place your backup into the usual location for backups. This means it is easy to find all your backups should you need to restore it and any automated clean up process will clean out your one-off backup.
Next click on "Add..." and browse out to a path you know has room for your backup

Step 4

Enter the file name. I suggest the format "Database_Name_backup_YYYY_MM_DD.bak" as it is simple and follows the pattern of an automated SQL Server backup.
Enter the file name.
Once ready click OK.

Step 5

Here are the options, file path and name ready to backup.
the options and file path and name ready to backup
It is ready to backup now. However at this point we could choose to click OK and back it up or click on the "Script" menu item. Clicking on Script will not run the backup, but produce a script for you.
(Note that tip 1070 by Greg Robidoux explains one TSQL method of performing backups.)
Let’s click on "OK" to do the backup. Notice the green circle icon indicates the backup percentage. Then it pops up a message once completed.
 click on ok to do the backup
Click "OK" and the screen goes back to normal.
If we browse to that location we should see the backup.
If we browse to that location we should see the backup
Well done on a successful backup using the SSMS GUI.

Sunday, July 28, 2013

Creating a Visual Studio Database Project for an existing SQL Server Database


By:    

Problem

Continuous Integration has become standard practice for many development projects. Every time a developer checks in a piece of code, the entire project or solution is built and deployed to an environment to make sure it didn't 'break the build'. Developers have been using source control for a long time, but there just wasn't a good way to get database objects under source control. As a result, there are many applications out there with the 'application code' in source control, but the database code is unmanaged. The preferred route for getting the database into source control at many shops will be Database Projects. If you are in this position, and your shop is using Visual Studio, there is a relatively easy path to get your databases into Database Projects, and ultimately source control. 'Reverse engineering' your database into a Database Project will help you start leveraging the features of Visual Studio Database Projects available in VS Premium and VS Ultimate (including source control, continuous integration, and code analysis).

Solution

We can use Visual Studio to run the Import Database Wizard and populate an empty Database Project.
Download the sample AdventureWorks database (AdventureWorks2008_Database.zip was used for this example) fromCodePlex, and attach the AdventureWorks2008 database to follow along with this tip.
NOTE: The screenshots are from Visual Studio 2010, but the same general process will work with Database Projects in Visual Studio 2005/08. Visual Studio 2005/08/10 all use VSDBCMD.exe for deploying Database Projects, while 2012 went to a new method for deployment.

Create an Empty Database Project

  1. Open Visual Studio 2010.
  2. From the File Menu, select New > Project...
  3. In the Installed Templates tab, expand Database > SQL Server > Advanced
  4. Select the SQL Server 2008 Database Project, and enter the Name of your database

    Open Visual Studio 2010
  5. Click OK and an empty Database Project will be created.

Run the Import Database Wizard

  1. From the Project Menu, select Import Database Objects and Settings...
  2. Click New Connection...
  3. Select your local Server name, credentials, and database name. TIPClick Test Connection here before clickingOK.

    Run the Import Database Wizard
  4. Click Start. I recommend keeping the provided defaults, unless you understand the implications of not accepting the defaults.
  5. You will see a progress bar as Visual Studio inspects the selected database, and populates the Database Project with all of the database objects.
  6. Click Finish.

    select Import Database Objects and Settings...

Next Steps

Congratulations! Your database has been imported into a Database Project, and you should now start managing your database from Visual Studio and make sure you get source control set up. You will also want to learn how to deploythose changes from Visual Studio to SQL Server. I have been using Database Projects for a long time now, and I haven't come across many limitations. There are times I still prefer to write my code in SQL Server Management Studio, and then import the code into Visual Studio, but that is mostly a personal preference.

Saturday, July 27, 2013

select, insert, update, delete statements using Store Procedure in SQLServer

Here, we will see how to create select, insert, update, delete statements using stored procedure. Let's take a look at a practical example. We create a table.
Creating Table
CREATE TABLE employee(
    id          INTEGER NOT NULL PRIMARY KEY,
    first_name  VARCHAR(10),
    last_name   VARCHAR(10),
    salary      DECIMAL(10,2),
    city        VARCHAR(20),   
 )
Now insert some values in the table and using select statement to select a table.
 INSERT INTO employee VALUES (2, 'Monu',  'Rathor',4789,'Agra');
 GO
 INSERT INTO employee VALUES (4, 'Rahul' ,  'Saxena',   5567,'London');
 GO
 INSERT INTO employee VALUES (5, 'prabhat',  'kumar',  4467,'Bombay');
 go
 INSERT INTO employee VALUES (6, 'ramu',  'kksingh',  3456'jk');
 go
 select * from employee
Table looks like this.
employeetable.gif
Figure 1
Stored procedure for Select, insert, update, delete
Here, we create a stored procedure for select,insert,update,delete statements to select the data from the table.
Alter PROCEDURE MasterInsertUpdateDelete
(
    @id         INTEGER,
    @first_name  VARCHAR(10),
    @last_name   VARCHAR(10),
    @salary      DECIMAL(10,2),
    @city        VARCHAR(20), 
    @StatementType nvarchar(20) = ''
)

AS
BEGIN
IF @StatementType = 'Insert'
BEGIN
insert into employee (id,first_name,last_name,salary,city) values( @id, @first_name,  @last_name,  @salary, @city)   
END

IF @StatementType = 'Select'
BEGIN
select * from employee
END 

IF @StatementType = 'Update'
BEGIN
UPDATE employee SET
            First_name =  @first_name, last_name = @last_name, salary = @salary,
            city = @city
      WHERE id = @id
END

else IF @StatementType = 'Delete'
BEGIN
DELETE FROM employee WHERE id = @id
END
end
Now press F5 to execute the stored procedure.
Now open object explorer and select storeprocedure MasterInsertUpdateDelete.
Stored Procedure to Check Insert
StatementType = 'Insert'
MasterInsertUpdateDelete -> right click select execute stored procedure...
employeetable1.gif
Figure2
Execute procedure window will be open.
employeetable3.gif
Figure3
Now for insert we fill the data in required field.
StatementType=insert
employeetable4.gif
Figure4
Click on the ok Button. and check in the employee table with following inserted data.
employeetable5.gif
Figure5
Stored Procedure to Check update
MasterInsertUpdateDelete -> right click select execute stored procedure...
Execute procedure window will be open.
StatementType = 'Update'
employeetable6.gif
Figure6
Click on the ok Button. and check in the employee table with following updated data where id is 7.
employeetable7.gif
Figure7
Stored Procedure to Check Delete
MasterInsertUpdateDelete -> right click select execute stored procedure...
Execute procedure window will be open.
StatementType = 'Delete'
employeetable8.gif
Figure8
we delete record from table which has id=2
Click on the ok Button. and check in the employee table with following deleted data where id is 2.
employeetable9.gif