| By: Greg Robidoux | Read Comments (41) | Related Tips: 1 | 2 | 3 | 4 | 5 | More > Integration Services Excel |
Problem
One task that most people are faced with at some point in time is the need to import data into SQL Server from an Excel spreadsheet. We have talked about different approaches to doing this in previous tips using OPENROWSET, OPENQUERY, Link Servers, etc... These options are great, but they may not necessarily give you as much control as you may need during the import process.
Another approach to doing this is using SQL Server Integration Services (SSIS). With SSIS you can import different types of data as well as apply other logic during the importing process. One problem though that I have faced with importing data from Excel into a SQL Server table is the issue of having to convert data types from Unicode to non-Unicode. SSIS treats data in an Excel file as Unicode, but my database tables are defined as non-Unicode, because I don't have the need to store other code sets and therefore I don't want to waste additional storage space. Is there any simple way to do this in SSIS?
Solution
If you have used SSIS to import Excel data into SQL Server you may have run into the issue of having to convert data from Unicode to non-Unicode. By default Excel data is treated as Unicode and also by default when you create new tables SQL Server will make your character type columns Unicode as well (nchar, nvarchar,etc...) If you don't have the need to store Unicode data, you probably always use non-Unicode datatypes such as char and varchar when creating your tables, so what is the easiest way to import my Excel data into non-Unicode columns?
The following shows two different examples of importing data from Excel into SQL Server. The first example uses Unicode datatypes and the second does not.
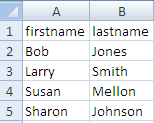
Here is what the data in Excel looks like.
Example 1 - Unicode data types in SQL Server
Our table 'unicode" is defined as follows:
If we create a simple Data Flow Task and an Excel Source and an OLE DB Destination mapping firstname to firstname and lastname to lastname the import works great as shown below.

Example 2- non-Unicode data types in SQL Server
Our table 'non_unicode" is defined as follows:
If we map the columns firstname to firstname and lastname to lastname we automatically get the following error in the OLE DB Destination.
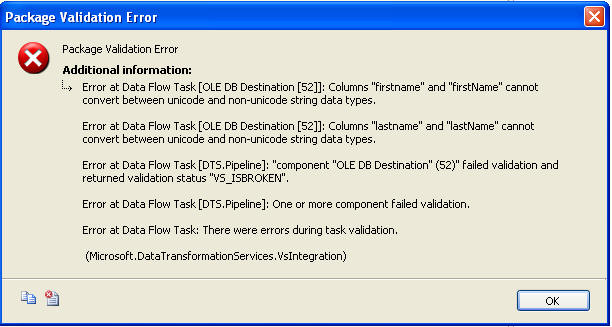
Columns "firstname" and "firstname" cannot convert between unicode and non-unicode data types...

If we execute the task we get the following error dialog box which gives us additional information.
Solving the Problem
So based on the error we need to convert the data types so they are the same types.
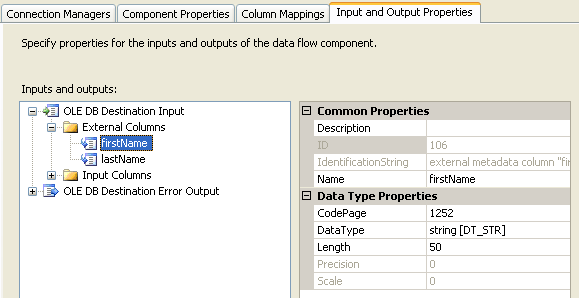
If you right click on the OLE Destination and select "Show Advanced Editor" you have the option of changing the DataType from string [DT_STR] to Unicode string [DT_WSTR]. But once you click on OK it looks like the changed was saved, but if you open the editor again the change is gone and back to the original value. This makes sense since you can not change the data type in the actual table.
If you right click on the Excel Source and select "Show Advanced Editor" you have the option of changing the DataType from Unicode string [DT_WSTR] to string [DT_STR] and the change is saved.
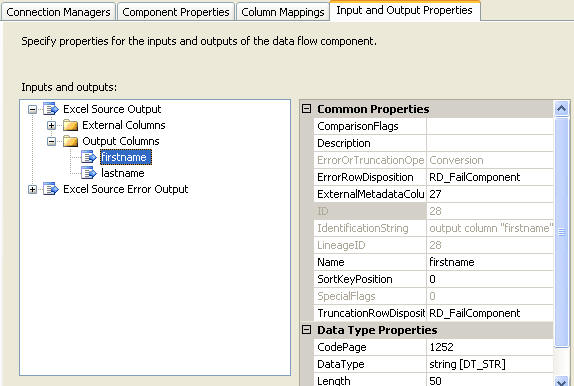
If you click OK the change is saved, but now you get the error in the Excel Source that you can not convert between unicode and non-unicode as shown below. So this did not solve the problem either.

Using the Data Conversion Task
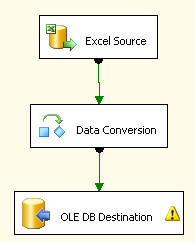
So to get around this problem we have to also use a Data Conversion task. This will allow us to convert data types so we can get the import completed. The following picture shows the "Data Conversion" task in between the Excel Source and the OLE DB Destination.
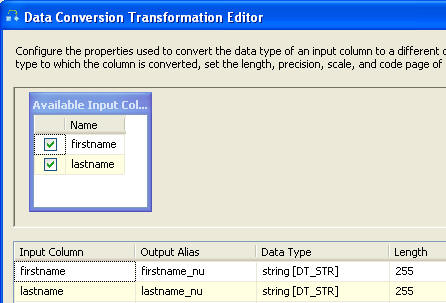
If you right click on "Data Conversion" and select properties you will get a dialog box such as the following. In here we created an Output Alias for each column.
Our firstname column becomes firstname_nu (this could be any name you want) and we are making the output be a non-unicode string. In addition we do the same thing for the lastname column.
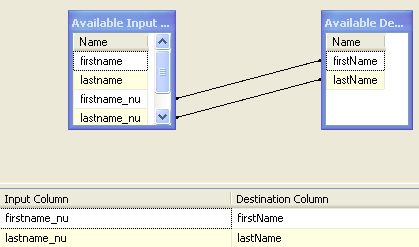
If we save this and change the mapping as shown to use our new output columns and then execute the task we can see that the import was successful.
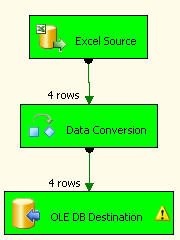
As you can see this is pretty simple to do once you know that you need to use the Data Conversion task to convert the data types.
No comments:
Post a Comment