| By: Rick Krueger |
Problem
Continuous Integration has become standard practice for many development projects. Every time a developer checks in a piece of code, the entire project or solution is built and deployed to an environment to make sure it didn't 'break the build'. Developers have been using source control for a long time, but there just wasn't a good way to get database objects under source control. As a result, there are many applications out there with the 'application code' in source control, but the database code is unmanaged. The preferred route for getting the database into source control at many shops will be Database Projects. If you are in this position, and your shop is using Visual Studio, there is a relatively easy path to get your databases into Database Projects, and ultimately source control. 'Reverse engineering' your database into a Database Project will help you start leveraging the features of Visual Studio Database Projects available in VS Premium and VS Ultimate (including source control, continuous integration, and code analysis).
Solution
We can use Visual Studio to run the Import Database Wizard and populate an empty Database Project.
Download the sample AdventureWorks database (AdventureWorks2008_Database.zip was used for this example) fromCodePlex, and attach the AdventureWorks2008 database to follow along with this tip.
NOTE: The screenshots are from Visual Studio 2010, but the same general process will work with Database Projects in Visual Studio 2005/08. Visual Studio 2005/08/10 all use VSDBCMD.exe for deploying Database Projects, while 2012 went to a new method for deployment.
Create an Empty Database Project
- Open Visual Studio 2010.
- From the File Menu, select New > Project...
- In the Installed Templates tab, expand Database > SQL Server > Advanced
- Select the SQL Server 2008 Database Project, and enter the Name of your database
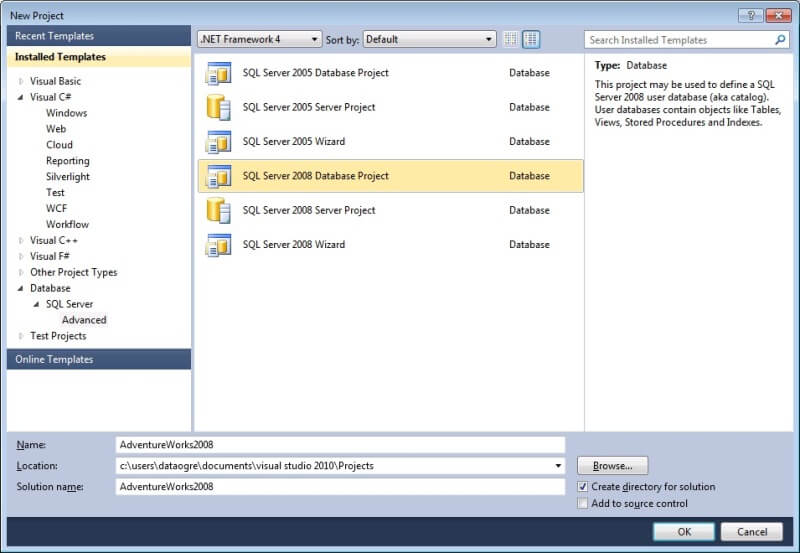
- Click OK and an empty Database Project will be created.
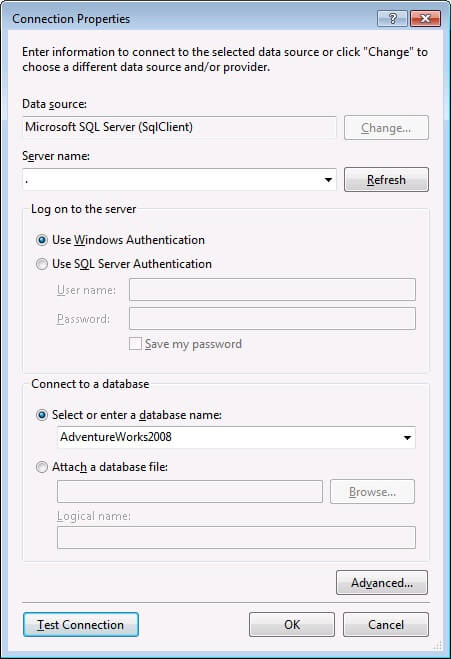
Run the Import Database Wizard
- From the Project Menu, select Import Database Objects and Settings...
- Click New Connection...
- Select your local Server name, credentials, and database name. TIP: Click Test Connection here before clickingOK.
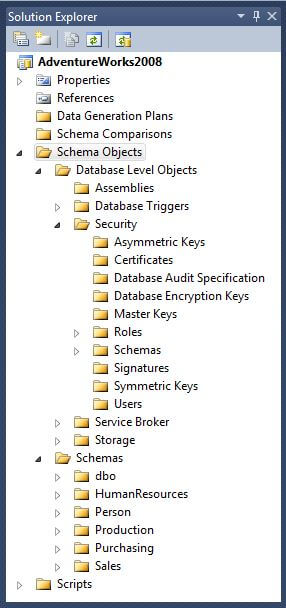
- Click Start. I recommend keeping the provided defaults, unless you understand the implications of not accepting the defaults.
- You will see a progress bar as Visual Studio inspects the selected database, and populates the Database Project with all of the database objects.
- Click Finish.
Next Steps
Congratulations! Your database has been imported into a Database Project, and you should now start managing your database from Visual Studio and make sure you get source control set up. You will also want to learn how to deploythose changes from Visual Studio to SQL Server. I have been using Database Projects for a long time now, and I haven't come across many limitations. There are times I still prefer to write my code in SQL Server Management Studio, and then import the code into Visual Studio, but that is mostly a personal preference.
- Learn more about Visual Studio Database Projects
- Check out Adding Tables To A Database Project
- Visit Adding Additional Objects To A Database Project
- Use the MergeScripts Extension to organize and consolidate table scripts
No comments:
Post a Comment